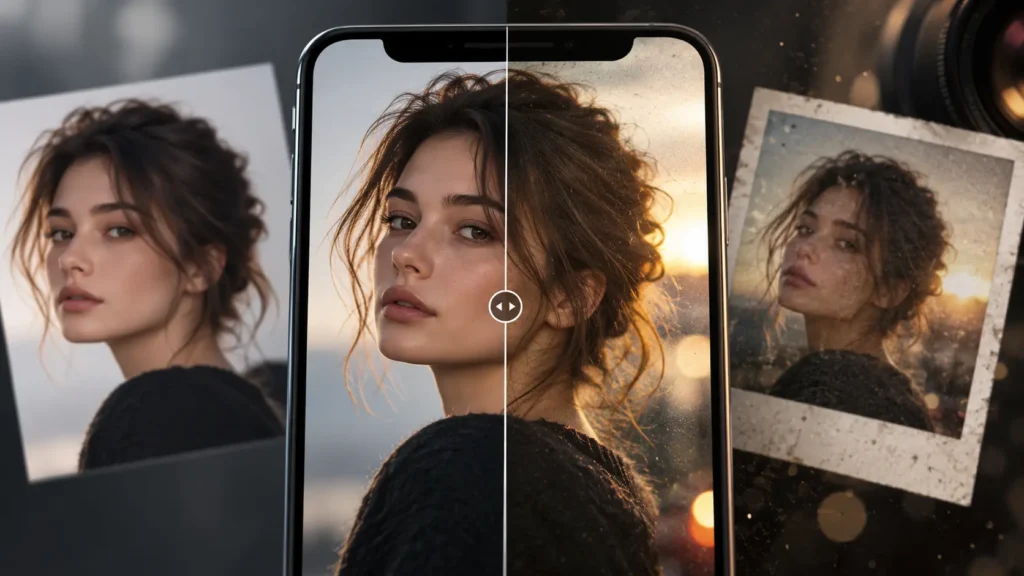
To make an AI image look realistic, you don’t need a better prompt or another AI model. You need to add what a real camera always leaves behind: sensor noise, small lens flaws, the processing a phone applies after every shot, and JPEG compression.
AI generators have become very good at faces, light and composition. Yet most of their images still look “rendered”: skin like wax, every edge razor sharp, colors a little too clean. People notice it within a second, even when they can’t say why.
This guide explains where that plastic look comes from, what a phone camera does differently, and how to add those traces to an AI image step by step with Make AI Photos Look Real, a free tool that works in your browser. The image itself is never redrawn: faces, text and details stay exactly as they are.
Why do AI images look fake?
AI images look fake because they are too clean. A generator is trained to produce a finished picture, while a camera records light through imperfect hardware. Five tells give a generated image away.
1. No sensor noise
Every camera sensor adds random noise, and it grows in the shadows and in low light. Generated images are smooth down to the last pixel. Skin, sky and walls look airbrushed, and the eye reads that smoothness as artificial.
2. Sharp from corner to corner
The small lens in a phone is sharpest in the center and softer toward the edges. Generators render the whole frame with the same crispness, so the corners of an AI image look as detailed as the subject.
3. Light without flaws
Real photos have vignetting (corners slightly darker), thin color fringes on high-contrast edges and highlights that clip to white. AI light is even and well behaved everywhere.
4. Colors and tones that are too balanced
Phones push their own look: lifted shadows, compressed highlights, a warm or cool cast, extra local contrast from HDR. AI images usually have a neutral, studio-perfect balance that no phone produces.
5. Pixels that were never compressed
Almost every photo you see online has been saved as JPEG at least once, often twice after passing through a chat app. AI output is usually a lossless PNG, without the small blocks and halos that compression leaves around edges.
What a phone camera leaves in every photo
A phone photo is the result of four stages, and each one leaves a mark. To make an AI image believable, you add those marks in the same order.
The lens. Light passes through a lens a few millimeters wide. It darkens the corners, bends straight lines slightly near the edges and splits colors on contrasty borders (chromatic aberration).
The sensor. A small sensor turns light into numbers with some randomness. That is noise, or grain: fine in bright areas, clearly visible in shadows and at high ISO.
The processing. The phone’s image processor (ISP) then reworks the picture: it merges exposures for HDR, opens the shadows, protects the highlights, shifts the white balance and sharpens edges, which creates thin halos.
The compression. The result is saved as JPEG (or HEIC, converted to JPEG when shared). Sending it through a chat app shrinks and compresses it a second time.
None of these marks is a defect people consciously look for. Their absence is what feels wrong.
How to make an AI image look realistic, step by step
The whole process takes under a minute with the free tool. It works in any modern browser, on desktop and on phones, with no sign-up.
Load the image. Choose a file, drag it onto the preview or paste it with Ctrl+V. JPEG, PNG and WebP all work.
Pick a device style. Start from the look that suits the picture: iPhone, Galaxy, Pixel, Basic Android, Night or From chat. The effect appears immediately.
Set the overall intensity. One slider scales every effect at once, from 0% (untouched) to 150% (heavily processed). Most images look right between 70% and 110%.
Compare before and after. Drag the handle across the preview to see the original on the left and the result on the right.
Check the grain at 1:1. Switch the view to 1:1 to see the image at full resolution. Grain that looks fine when scaled down can be too strong up close, and the reverse.
Fine-tune if needed. Open the adjustments to change any single effect (all controls are explained below). Press New grain for a different random noise pattern.
Download. Choose the size and JPEG quality, then download. The image is processed again at full resolution, so the file is sharper than the preview.
Tip: if a result looks “filtered”, lower the intensity before touching single controls. Real phone processing is subtle; overdoing it is the most common mistake.
The six device styles and when to use each
Each style is a starting point built on the typical character of a kind of phone camera. They are not official profiles from Apple, Samsung or Google, and every value can be changed afterwards.
Style
Character
Best for
Default JPEG quality
iPhone
Warm and soft, measured HDR, gentle sharpening
Portraits, product shots, lifestyle
90
Galaxy
Saturated colors, strong sharpening, bright
Food, landscapes, colorful scenes
88
Pixel
Strong HDR contrast, cooler tones, deep shadows opened up
Architecture, street, interiors
90
Basic Android
Visible noise, heavy halos, softer corners
Casual snapshots, “real user” content
74
Night
High ISO grain, color noise, slight hand shake
Evening, indoor and low-light scenes
84
From chat
Downsized to 1600 px, compressed twice
Images meant to look shared through a messaging app
72, then a second pass
If you are unsure, start with iPhone: it is the most neutral and works on almost any subject.
Every control explained
The tool has 18 controls in five groups. You rarely need all of them, but knowing what each one imitates makes the result more convincing.
Sensor: the grain
Grain (ISO) sets how much noise is added. The noise follows the brightness of the image, as on a real sensor: almost invisible in highlights, stronger in shadows. The preview shows a simulated ISO value, from 50 to 3200.
Grain size makes the noise finer or coarser. Small sensors and heavy processing produce slightly clumpy grain, not single-pixel dots.
Color noise adds faint colored blotches in dark areas, typical of photos taken in dim light.
Optics: the lens
Vignetting darkens the corners gradually.
Chromatic aberration separates red and blue slightly toward the edges, creating thin color fringes on contrasty borders.
Distortion bends the image outward (barrel) or inward. Wide phone lenses have a little barrel distortion. The frame is cropped automatically so no empty borders appear.
Edge softness blurs the outer area slightly, leaving the center sharp.
Color and tone: the phone’s processing
Temperature and Tint shift the white balance toward warm or cool, and toward magenta or green.
Contrast adds an S-curve or flattens the image.
Lifted shadows opens dark areas, as phone HDR does.
Compressed highlights pulls bright areas down slightly, the slightly gray whites typical of phone HDR.
Local contrast (HDR) boosts detail in mid-tones. Too much creates the “overprocessed phone” look, which can be exactly what you want.
Saturation makes colors richer or more muted.
Sharpness: the halos
Amount sets how strongly edges are sharpened.
Halo radius sets how wide the light and dark halos around edges are. Cheaper phones have wider halos.
Sharpening runs after the grain, as in a real phone, so it also sharpens the noise. That interaction is a big part of what makes a phone photo look like one.
Imperfections: the human hand
Micro shake adds a tiny directional blur, as from a hand moving during a slower shutter. The preview shows the simulated shutter speed, from 1/250 to 1/15.
Tilt rotates the horizon by up to 3 degrees. Very few handheld photos are perfectly level.
Export settings: size, JPEG and the AI label
The last step matters as much as the effects, because compression is part of the look.
Size. Keep the original, or choose 4032 px (the long side of a 12 MP phone photo), 2048 px, 1600 px (typical of chat apps) or 1080 px (typical of social feeds). The maximum is 6000 px on the long side.
JPEG quality. From 40 to 100. Phones save around 85–92. Below 75 the blocks around edges start to show, which suits the Basic Android and From chat styles.
Double compression. Saves the image twice, the second time at a lower quality, like a photo sent through a messaging app and saved again.
AI label. An optional small “AI-generated image” tag in a corner of the picture. You choose the text and the position. It is off by default, because the tool also works on real photos.
The exported JPEG contains no metadata: no camera model, no date, no location, and no invented camera data. To check the metadata of any photo, use the EXIF Editor. To remove metadata from other photos, use the Photo Anonymizer.
Recipes for common images
These settings are starting points for typical AI images. Adjust intensity first, then single controls.
Image
Style
Intensity
What to adjust
Portrait or headshot
iPhone
80–100%
Grain (ISO) up to 25–30 to break up waxy skin; keep Local contrast low so skin stays soft
Product on a plain background
iPhone or Pixel
70–90%
Vignetting 15–25; Edge softness 10–20; JPEG 88–92
Food
Galaxy
90–110%
Temperature +10 to +15; Saturation as is; Micro shake 0
Interior or architecture
Pixel
90–110%
Distortion 8–15; Lifted shadows 40+; Tilt 0 unless you want a casual feel
Street or travel snapshot
Basic Android
70–100%
Tilt ±1 to ±2 degrees; Micro shake 10–20
Evening or indoor scene
Night
90–120%
Color noise 40–50; Micro shake 25–35; check the grain at 1:1
Image for a chat or social post
From chat
100%
Leave the size at 1600 px and double compression on
The most convincing results usually combine three things: grain in the shadows, a slight vignette and real JPEG compression. Everything else is fine-tuning.
Using realistic AI images honestly
A natural look is useful wherever a plastic render distracts from the message: mockups, ads, social posts, presentations, concept art, product visuals. It is not meant to pass off a synthetic image as a real event or as a real person’s photo.
A few practical rules:
Label AI images where it matters. In some contexts, rules such as the EU AI Act require realistic synthetic images to be disclosed, and many platforms ask for the same. The tool’s optional label makes this a single click.
Don’t use it on images of real people without consent. A more realistic fake of a real person is still a fake.
Don’t present AI images as evidence. News, reviews, insurance claims and documents need real photos.
The tool changes how an image looks to people. It makes no attempt to remove the invisible watermarks that some generators embed in the pixels.
Frequently asked questions
How do I make an AI image look less like AI?
Add the traces of a real camera: grain that is stronger in the shadows, a slight vignette, a little lens softness at the edges, phone-style tone processing and JPEG compression. Lower the overall polish rather than adding more detail.
Why does my AI image look plastic?
Because it has no sensor noise and no compression. Smooth surfaces with no grain, especially skin, read as airbrushed. Adding fine, brightness-dependent grain is the single most effective fix.
Can I make an AI image look like an iPhone photo?
Yes. The iPhone style reproduces the typical character of iPhone pictures: warm, soft tones, measured HDR and gentle sharpening. It does not copy any official Apple profile, and it does not write iPhone camera data into the file.
Does adding grain alone make an AI image look real?
It helps a lot, but grain alone can look like a filter. Combined with lens vignetting, tone processing and real JPEG compression, the result looks captured rather than edited.
Will the tool change faces, text or details?
No. Nothing is redrawn by AI. The effects are applied on top of the existing pixels, so the content of the image stays the same.
Does it work on real photos too?
Yes. You can give any picture a phone-camera look, for example to make a clean studio shot match a set of phone photos.
Is it free?
Yes. No sign-up, no watermark and no limit on the number of images.
Does it lower AI detector scores?
It can. Many AI image detectors look at texture statistics such as noise, sharpness and compression, the same traces this tool adds. In one of our tests, a generated image went from a 100% to a 35% AI score after processing. Results vary by detector and by image, and the tool does not make an image undetectable: detectors based on invisible watermarks, such as Google’s SynthID, are not affected.
Which formats are supported?
Input: JPEG, PNG, WebP and any other format your browser can open. Output: JPEG, up to 6000 px on the long side.
Ready to try it? Open Make AI Photos Look Real, load an AI image and compare the before and after.
Gestisci la tua privacy
To provide the best experiences, we and our partners use technologies like cookies to store and/or access device information. Consenting to these technologies will allow us and our partners to process personal data such as browsing behavior or unique IDs on this site and show (non-) personalized ads. Not consenting or withdrawing consent, may adversely affect certain features and functions.
Click below to consent to the above or make granular choices. Your choices will be applied to this site only. You can change your settings at any time, including withdrawing your consent, by using the toggles on the Cookie Policy, or by clicking on the manage consent button at the bottom of the screen.
Funzionale
Always active
L'archiviazione tecnica o l'accesso sono strettamente necessari al fine legittimo di consentire l'uso di un servizio specifico esplicitamente richiesto dall'abbonato o dall'utente, o al solo scopo di effettuare la trasmissione di una comunicazione su una rete di comunicazione elettronica.
Preferenze
L'archiviazione tecnica o l'accesso sono necessari per lo scopo legittimo di memorizzare le preferenze che non sono richieste dall'abbonato o dall'utente.
Statistiche
L'archiviazione tecnica o l'accesso che viene utilizzato esclusivamente per scopi statistici.L'archiviazione tecnica o l'accesso che viene utilizzato esclusivamente per scopi statistici anonimi. Senza un mandato di comparizione, una conformità volontaria da parte del vostro Fornitore di Servizi Internet, o ulteriori registrazioni da parte di terzi, le informazioni memorizzate o recuperate per questo scopo da sole non possono di solito essere utilizzate per l'identificazione.
Marketing
L'archiviazione tecnica o l'accesso sono necessari per creare profili di utenti per inviare pubblicità, o per tracciare l'utente su un sito web o su diversi siti web per scopi di marketing simili.